Are your WordPress emails going to spam? Or they are not getting delivered. Emails play a very vital role when it comes to your online business. You need to make sure that your email gets delivered.
The best way to fix this is to set up SMTP on your WordPress website. SMTP is a simple mail transfer protocol that will help you resolve email deliverability.
We’ll tell you how to set up SMTP using WP Mail SMTP Plugin on your WordPress website using Amazon SES.
Before going into the procedure let’s take a few minutes to thoroughly understand what Amazon SES stands for? And why is it important for setting up WordPress SMTP.
Table of Contents
What Is Amazon SES?
Amazon SES basically stands for ‘ Amazon simple email service’. It’s a cloud-based email sending service that is designed in order to send certain emails like marketing or transactions that needs to be sent to a certain audience.
This service is highly used among digital marketers that need to send important emails to other concerned parties.
Why Amazon SES?
The most significant part of online marketers is to transmit a certain amount of emails on a regular life basis to its employees or business partners and etc which involves sending a lot of emails every day. But why Amazon SES you ask? It’s one of the highest deliverability services which is cost-effective and provides accurate configuration. It’s used for sending transactional messages, for sending notifications receiving and sending emails.
Why Your Emails Are Not Received By The Users?
WordPress users mostly go through this issue, when their sent emails aren’t received by the recipient even though they send it or the emails move to spam themselves. This happens when you don’t opt for SMTP for sending emails. What is SMTP you ask? It is an application that is used for sending messages between servers.
WordPress uses PHP which is a program that helps create an interactive website. PHP is a scripted language and also an open-source just like WordPress.
The hosting in WordPress is generally not configured to use the PHP mail function because of which notifications or emails lead to failure and make way to the spam instead of delivering. This is why SMTP is used in order to send emails to the potential recipient as it ensures the delivery.
Using Amazon SES for mail delivery.
Amazon SES as said before is a cloud-based email sending service that was introduced by Amazon.com. when you set up your WordPress with SMTP there are huge chances that it might not work to the expectation since you don’t get to send a handful of emails due to the insufficient mail sending program. This is one Amazon SES jumps in, it’s a high durability service that ensures all your emails are delivered within the time and it’s cost-effective as well. The only thing to keep in mind is you must have an SSL certificate in your hosting plan.
How To Set Up WordPress SMTP Using Amazon SES?
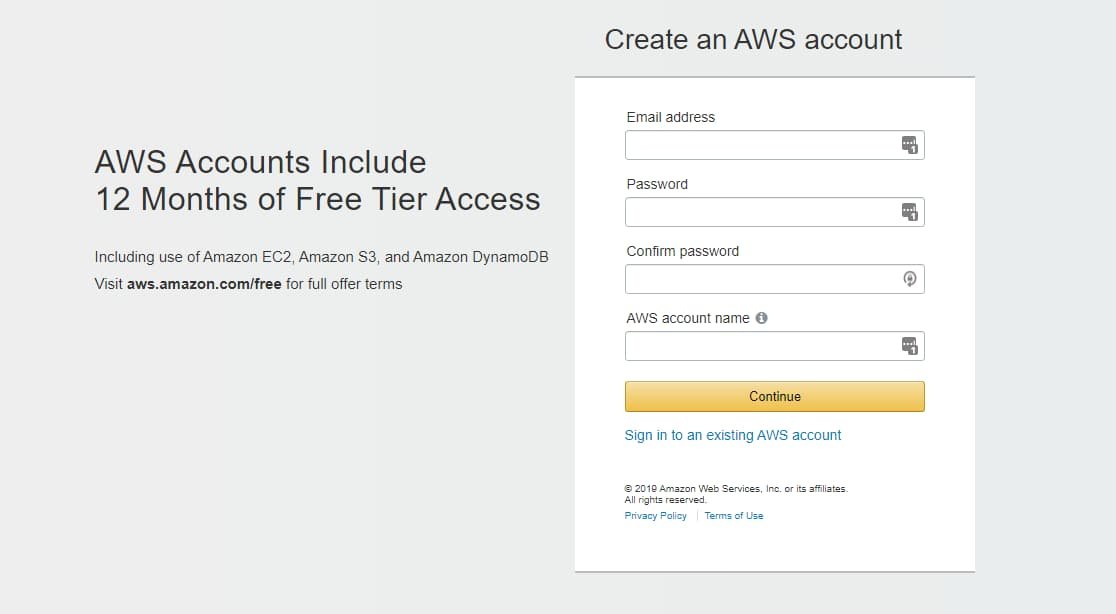
Create An AWS account
Firstly, you need to make an account which is quite easy, you simply go to the website and fill your information. Even though the account is totally free and the setup doesn’t require any payment either you must fill in your credit card information.
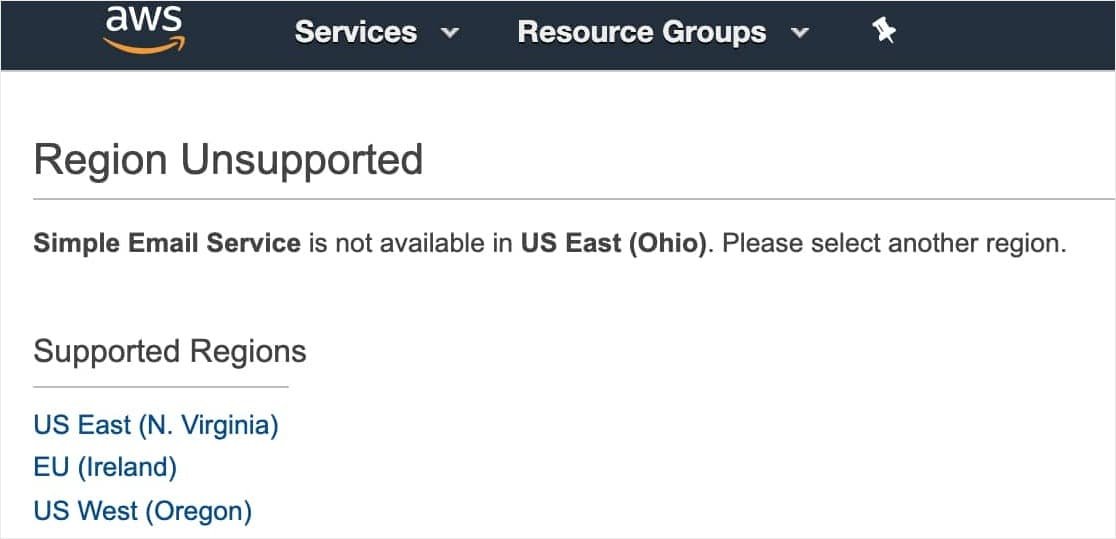
Select your region
After making an account you must fill in your residual address to make sure the SES is available in your region or not. If your address doesn’t show up in the search option simply go for the nearest address to your area.
Create an IAM user
After making your AWS account you need to set up an IAM user account. What’s IAM? Well, it’s a web service that helps you securely control access to AWS resources.
Why do you use it?
To ensure safety and control who holds permission to use those resources, its all in your hand with an IAM account. You must set up a new username which can be any name whatsoever but if you go for your domain name that would be even better.
You can also add multiple users at once with the same access. After choosing the username you must select the access type which gives you access to programmatic access that enables an access key id and other development tools then press permissions button to proceed to the next step.
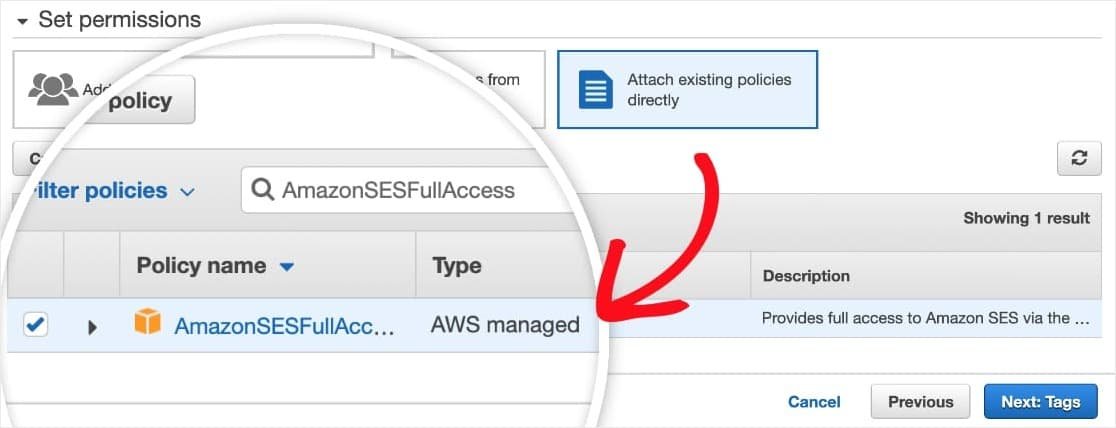
Configure IAM user setting permissions
In this next step, you need to select attach existing policies directly which is a blue doc box on the top row and type ‘AmazonSESfullAccess’ in the search bar and then you’ll see the policy name. Press the tags button when you’re done.
Review your details
In this step, you need to review your user details. Make sure you’re 100% sure with all the details. Once you have checked everything, click the create user button. Please note, you won’t get any message regarding your activation. Copy down your information or simply download a CSV.

Switch to AWS production mode –
When an Amazon SES account is made, it usually sets up into the sandbox default which limits the delivery of certain emails.in order to change the sandbox mode to production mode, you need to create a request to the Amazon web services. when you’re creating the case, make sure you choose the service limit increase so that you can send numerous emails to anyone.
Make sure you choose wisely because if the support system felt like your request wasn’t explained enough it will move to the spam applications.
You’ll be given a form that needs to be filled, it contains normal information like your website URL, whats Your business type, why do you need to send emails in a bulk? Etc will be asked from you, make sure you have explained them enough and when it’s done you’ll get two emails from the Amazon supporting teams, they will ensure you whether your case has been considered or not. It doesn’t take much time, but within a day or two, you’ll get your answer.

Install the WP Mail SMTP plugin
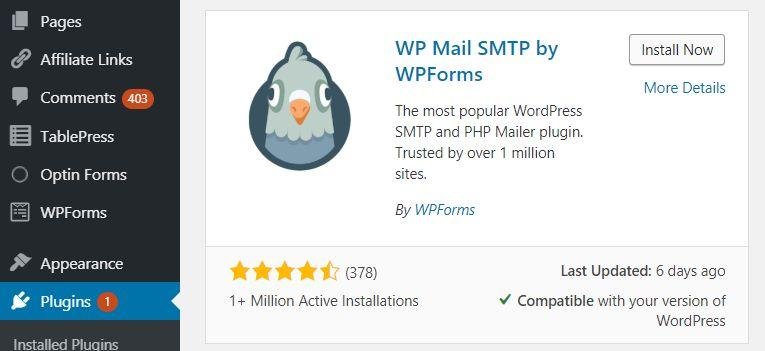
After making your request to the amazing web services meanwhile, you can install the WP mail SMTP on your WordPress site. Simply go to the website and install it and activate it. Click here to know how to install and activate the plugin.
Set Up WP Mail SMTP and Amazon SES
This is the most important part, this is where it matters the most. After installing the plugin, go to the settings and you’ll come across two options, one is from email and the other one is a force from email.
The first option, from the email you can choose any valid email address from any email provider like Google or outlook, etc. For better results, you could always go for your domain email address. In the force from the email option, you can keep the same email address to all the sites so that you don’t waste time editing your email settings in every sitewide.
Below these options, you’ll come across yet another space that asks you to provide the name which is the name that will be used for the ‘sender’ name. Another option force from email will entitle you to choose the very same name for site-wide to remove the extra hassle. Once all that is done you must scroll down to the mailer option and choose Amazon SES.
Once you have done that, make sure you check the return path option, it’s a very crucial step, it indicates whether non-delivery recipients or bounced messages have lost or not. Doing so, you’ll be directed to a new section named Amazon SES where you must fill the access key that you created in your AWS account ahead.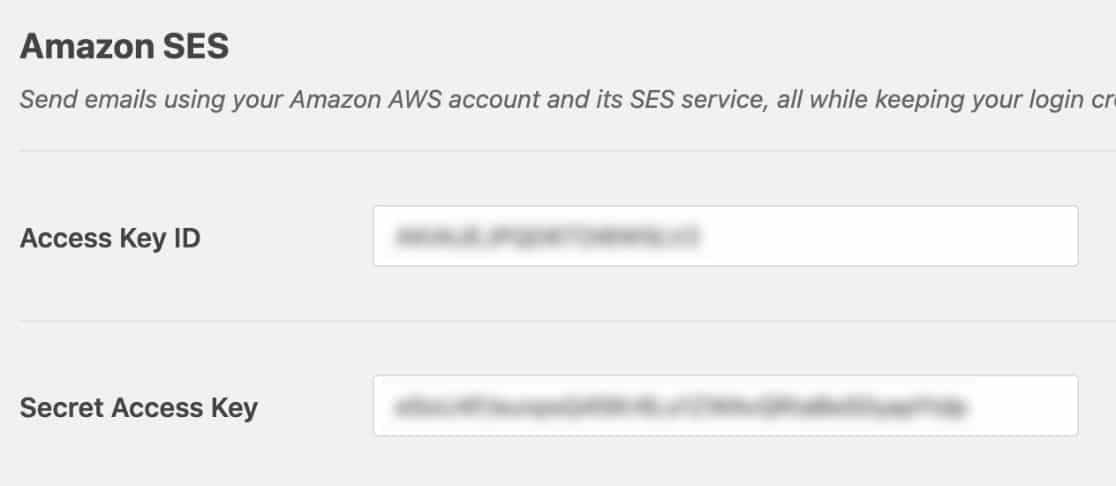
Put your access key id and secret access key. After that, you’ll find yourself in the region field where you must fill in your region that you selected during your hosting plan and that you picked in Amazon SES. It must match. After you have successfully done all these steps click save settings.
This is not the end, after this, you need to add any of your trusted email addresses to the verified emails option.
Click on the send certification email and you can expect an email from Amazon web services and they’ll provide you with a link within a day to verify your provided email address. After you have successfully verified your email, go back to your WP mail SMTP setting and refresh the page to see the updated information. You’ll see your verified email address will be put up on your page.
Send A Test Email
After all this hard work doesn’t forget to check whether your email is being delivered or not, send a test email, just go to the setting, click the email test option.
Fill in the send in the space bar which is your site’s admin email, choose the HTML option if you wish to send a professional email or for a plain text format turn the HTML off. Hit send and you’ll get an instant message that your email has been sent. You’ll also get a confirmation from WP mail SMTP in your inbox.
Conclusion
The process does sound confusing, but with the guide, we have provided it won’t be that hard, its not child’s play either. In each step don’t forget to double-check everything, make sure you’re choosing wisely. Don’t forget to check out the terms and conditions and the policy. After the whole setup, you’ll be good to go.