Do you want to keep a record of emails you send through your WordPress website?
I mean tracking all the emails you sent through your website i.e keeping email logs. I’ve seen a lot of people finding it difficult to keep a record of each email.
I’ll be sharing with you how you can set up Email Logs in WordPress in the simplest way.
With Email Logs, you can know what was the date and time the email was sent? Was it delivered, and if not, what’s the status? Did the right email make it to the right person? Everything about your emails.
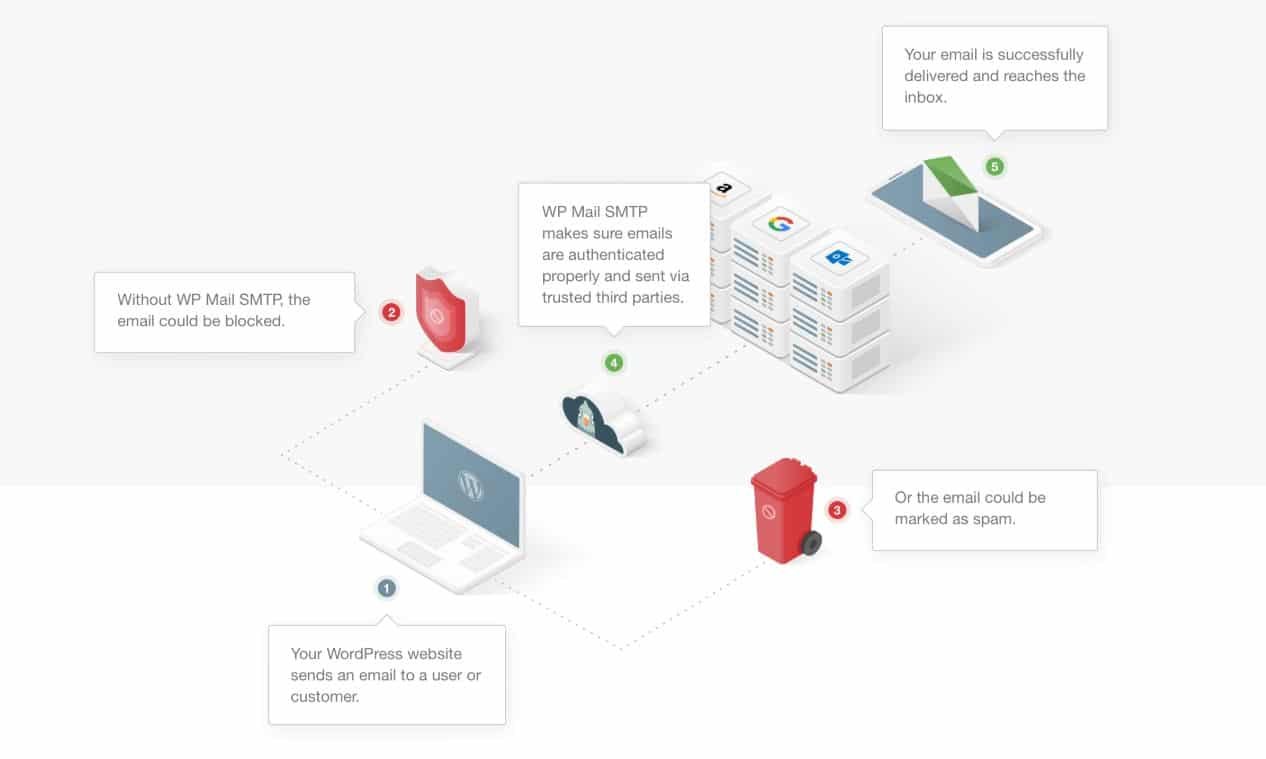
I’ve already published about WP Mail SMTP and, Today I’ll be using WP Mail SMTP to set up Email Logs.
Table of Contents
Why Should You Set Up Email Logs On Your Website?
Once you’ve done setting up the email logs on your WordPress Website then you’ll get more details about every email that have been sent from your website like:
- Email Delivery Status
- Date & Sent Time
- Track of emails category
- Data of the form notifications email when a user fills out a form.
- and many more.
Let’s know about WP Mail SMTP which will help us set the email logs.
What Is WP Mail SMTP?

WP Mail SMTP Pro is the premium version of the most popular WordPress SMTP & PHP mailer plugin. They have over 1 million+ active installations and is considered the best plugin for fixing email deliverability issues in WordPress. Back in 2017, WPForms have acquired them and since then they are behind it to make it better.
Also, It helps in keeping the email logs on your website.
How To Set Up Email Logs Using WP Mail SMTP?
You can set up email logs on your WordPress website in just 3 simple steps, Just follow the below steps:
STEP 1: Install & Activate WP Mail SMTP
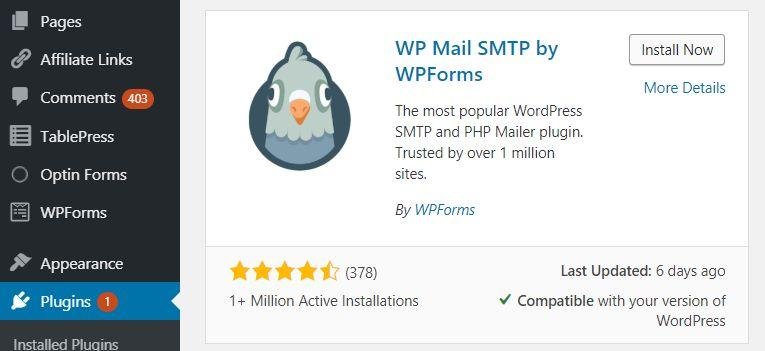
You have to Install & Activate the WP Mail SMTP plugin on your WordPress website.
If you don’t want to go for it on your own, You can ask the WP Mail SMTP team to do it for you. They offer White Glove Set Up only if you have their premium license. So they’ll do everything for you.
STEP 2: Enable WordPress Email Logs
After activating the WP Mail SMTP plugin, Navigate to WP Mail SMTP>> Settings and click on Email Log Tab.

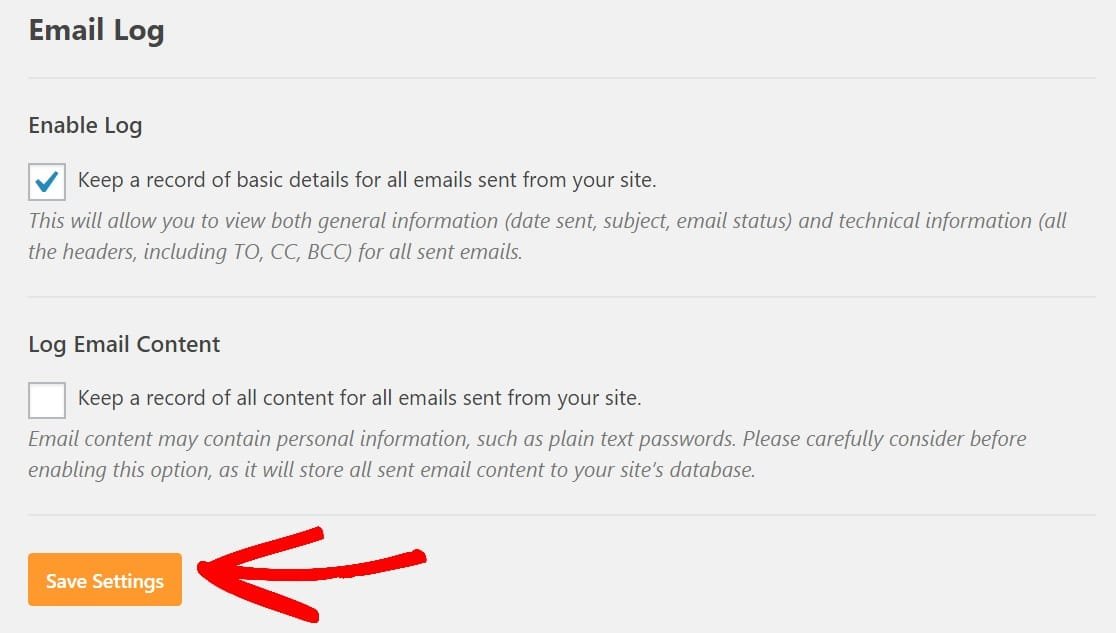
Now click on Enable Log to start recording all the email data of your Website.
Once you Enable the Email Log option then the following data about the emails will get recorded:
- Email Status (You can know the email is sent successfully).
- Date and Time Sent.
- Subject Line.
- Recipient Email Address(es) (including CC and BCC).
- From Email.
- Number of Attachments (In case you have set up your forms to accept multiple attachments).
- Mailer Options Used.
- Additional Technical Details (like content-type, MIME, and more).
After enabling this option, You’ll get an option to enable Log Email Content. Don’t enable it as it will save all the email log as plain text in your WordPress site database ( in simple terms no data encryption will be there).

Skip it and click on the Save Settings button.
That’s it, You’ve enabled the Email Log option and now every data will be stored on your website.
STEP 3: View WordPress Email Logs
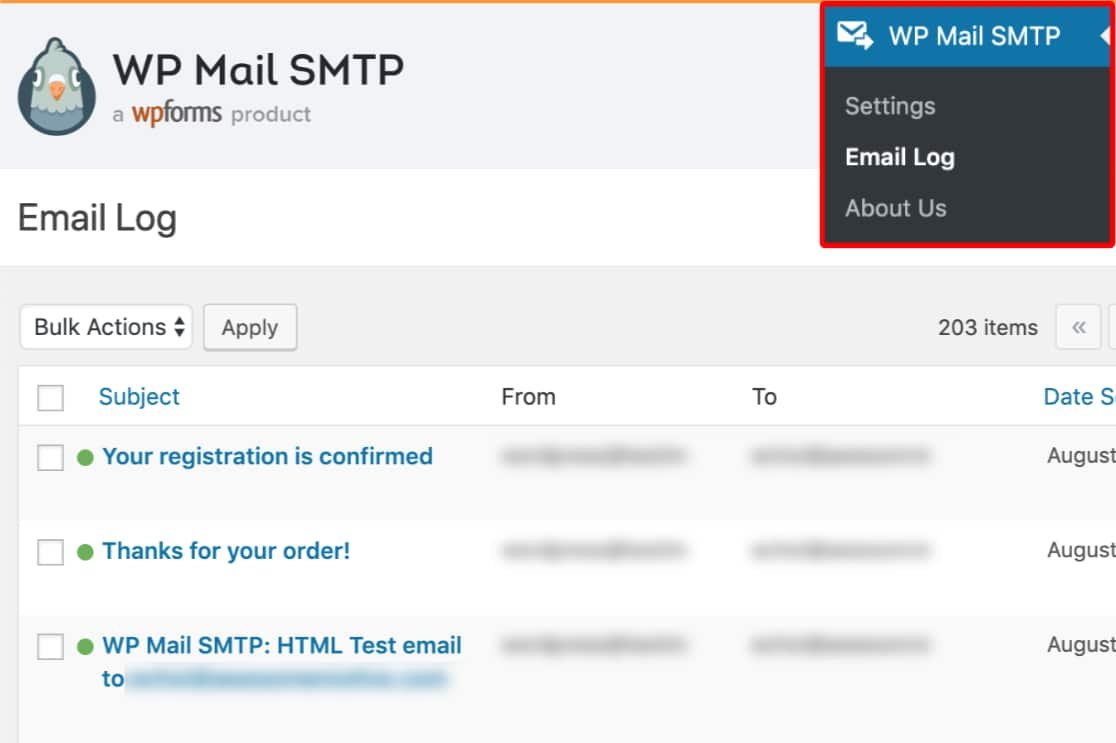
- Go to your WordPress Dashboard
- Click On WP Mail SMTP
- On the left side, Click on the Email Log
Image Source: WPForms - All the emails will be displayed
- To view a particular email, Just click on it and You’ll get every data about it
Wrapping Up
WP Mail SMTP is a very useful tool if you’re into digital marketing or you have your own digital business. It will help you keep a record of all your emails sent through your website.
It was all about setting up WP Mail SMTP to view the email logs.
Have you ever used WP Mail SMTP? Do let me know your views about this amazing plugin in the comments below.


